Posts

Showing posts from March, 2014

How to maximize the memory on the computer
Image
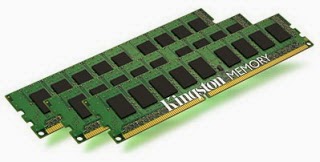
The steps are as follows : Right click on my computer and then select Properties Then select the advanced tab and click settings in the performance Then the performance options will appear, then select the visual effects tab. Then select custom and check as shown below: then click apply and ok. Good luck..
How to Order Folders Can Not be Deleted

Image
The steps are as follows :  Sign in to windows explorer (Win + E) and select tools  Click on tools and select folder options. Click the view on the folder option and remove cetang use simple file sharing Then right-click the folder that you select and click properties and select security and select advance Furthermore, uncheck inherit from the parent, then remove and ok. If you want to restore it to stay like that and enter enter and check inherit owner, it will be back to normal as before. Good luck

How to Shut Down Automatically In Windows 8

Image
The steps are as follows : Enabling Automatic Shutdown Sign in with a way to run Win + R Then write in the run dialog box as follows "at 12:00 shutdown-s" and click ok. Then automatic computer / laptop you will be able to shutdown by itself.  Disabling Automatic Shutdown If you want to restore to its original just write the command "shutdown-a" then the computer / laptop will be returned to its original state. Good Luck....

How To Increase Ram stick Utilizing Laptop

Image
The steps are as follows : Insert the flash is fairly large capacity, to computer Right click on my computer desktop icon> properties  Advanced> click settings in the performance menu  Advanced> change> click on C:> click No paging file> Set Click the flash drive, for example: G:  Choose System managed size, on no paging file> set  The recommended value of Total paging file size for all drives, not to be more than the capacity of flash  If you happen to more, locate and select a custom size. Fill in the total capacity of the flash, in the initial size and maximum size. reserving 5-6 mb Restart your computer and good luck

How to eliminate the Evalution Copy WinRar

Image
  The steps are as follows : 1 . Open Notepad 2 . Copy the code below and paste it in notepad RAR registration of data GoDesain Unlimited Company License UID = 85809e6a0fde94d8fa95 6412212250fa95dc80957d3b78af9245c62d98787c33099debe20a 4d39faf3beaeaf7ba62060fce6cb5ffde62890079861be57638717 7131ced835ed65cc743d9777f2ea71a8e32c7e593cf66794343565 b41bcf56929486b8bcdac33d50ecf77399600ffeefe7a2041d7fe7 9f06594bd79c285c2c19d7d9a786d95f8a05e6141248ddb9d9830f 6977c3aab5c4e4e651e4813323e9eb20ac3fd8b7173262fc601959 515d0a89683aae2654bfd31328af3e331535ea2d85dc1402723610 3 . Save the file with the name rarreg.key by replacing all files into a storage format 4 . Go to where you save the file rarreg.key 5 . Then move the file to winrar installation folder such as " C :/ Program files / Winrar 6 . If the folder is already a file named rarreg.key delete these files 7 . Replace the files that had been going on the move 8 . Then open WinRar and see if there are posts Evaluation Copy   9. Good ...

Install Mac OS X

Image
 In this case I will be installing Mac OS X 10.49 The steps are as follows : Insert the Installation CD Mac Mac OS X Install DVD into the tray , double -click the button Install Mac OS X icon . Then click Restart . The installation process will then open a window so the computer has finished restarting Stages of the installation process of Mac OS X. At the first stage is to select the language in the installation guide . Choose U.S. English , because the OS is not / does not provide the option of Indonesian . Then click the Forward button . Then the Welcome window is displayed The next stage is the manufacture and selection of a partition . Where the panel "Select a Destination " , specify the partition large to be used for the system and documents . Here I divide the hard disk into 3 partitions ( 80 GB , 20 GB and 3 GB ) Later stage is choosing the installation procedure for Mac OS X , if you install new or upgrade . Click the " Options" to select " Upgrade M...

How to install the front panel usb

Image
The steps are as follows :   Each pair of wires to the pins that will be linked to the number: 1-3 to the HDD LED cable 2-4 To the POWER LED cable  5-7 To RESET SW cable  6-8 To Cable POWER SW Then put each pin: 2 [C] [D] [D +] [G] [] pairs of pins [VCC] [USB2-] [USB2 +] [GND] [empty] 1 [C] [D] [D +] [G] tide pin [VCC] [USB1-] [USB1 +] [GND] In the first instance that is linked only MIC, MIC-POWER, AUD-OUT-R, AUD-OUT-L, and GND. In the second example there is the addition of which is connected at the first instance that there are 2 GND  In the third example more connected but there is only 1 GND and additions to the backout-R and backout-L Good Luck....